Issue: When an external user is sending an email to a distribution group which consists of both internal and external users. Emails to internal users get delivered but fails to be delivered to external members of the group. Sometimes the sender doesn’t even get NDR as they might not have been enabled. You can always track the email on Exchange online and it will show denied emails.
Fix: Connector needs to be set up along with a rule which uses that connector to route such emails out. So the connector would be called only by a transport rule. Connector will route email out to recipient domain MX. Rule will be that if the sender is external (you can restrict to specific sender / domain) and recipient is external (again you can restrict it to specific recipient / domain), then route it to the connector you created.
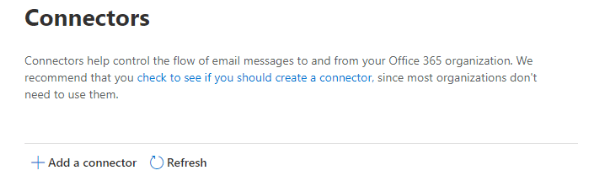
Outbound Connector
- Open exchange admin center (https://admin.exchange.microsoft.com)
- Click Mail flow on the left Panel and then click Connectors – Add a connector
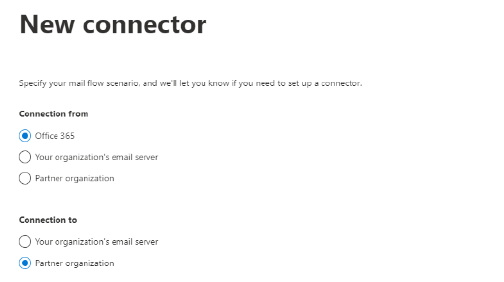
3. Under New connector, for Connection from, chose Office 365. For Connection choose Partner
choose Partner Organization and then press Next
4. Fill in the connector name, and add a description. Leave the “Turn it on box” checked and press Next
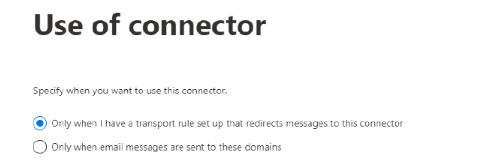
5. Under Use of connector, change this to Only when I have a transport rule set up that redirects messages to this connector and press Next
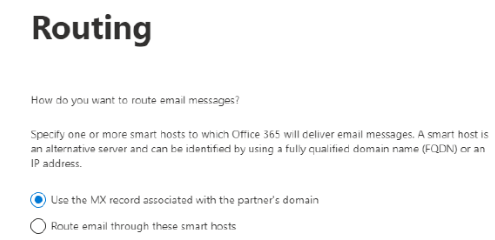
6. Under Routing, choose Use the MX record associated with the partner’s domain and click Next
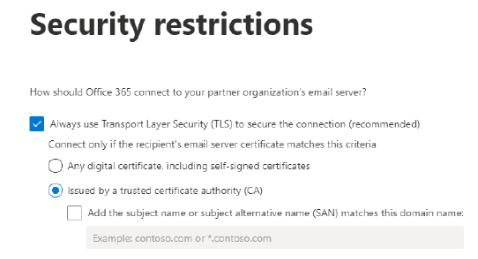
7. Under Security restrictions, leave these as default and press Next
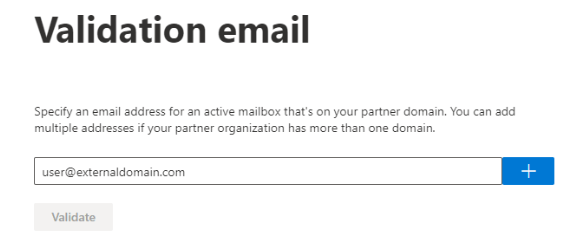
8. Under Validation email, put in an external email (i.e. user@externaldomain.com), click the + button, and press Validate. ***It is OK if the validation fails*** Once it is done validating, whether it passes or fails, click Next. If it failed, you will then click Yes, proceed
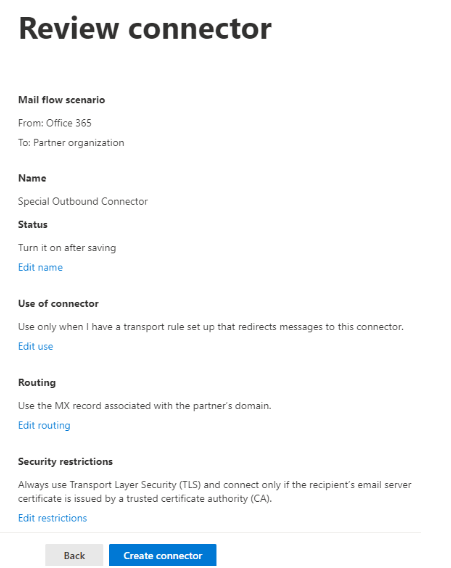
9. A Review connector window will show next. Click Create connector
Mail Flow Transport Rule
- Open the Exchange Admin Center (https://admin.exchange.microsoft.com)
- Click Mail Flow on the left hand panel, and then click Rules
- Click on Add a rule, and then click Create a new rule
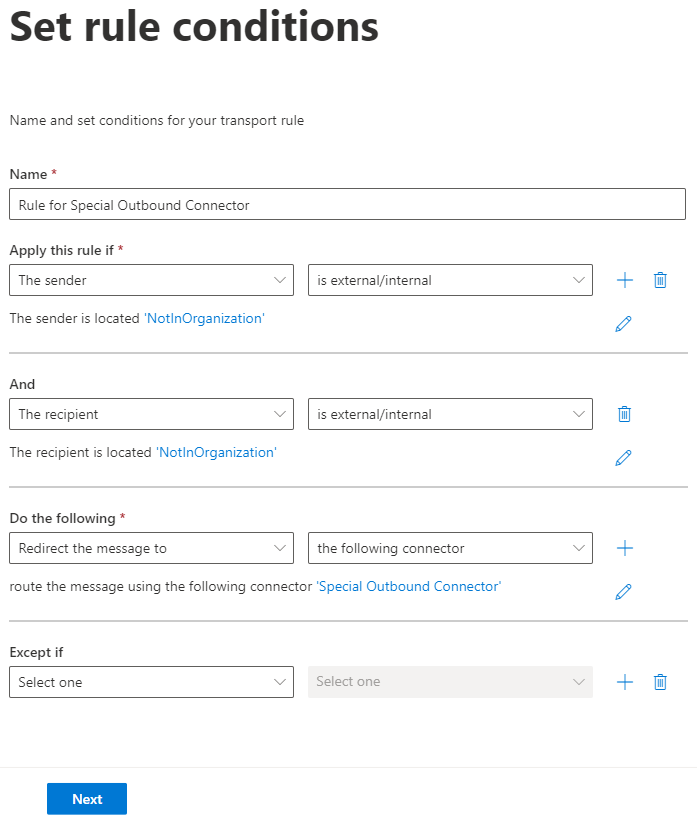
- Under Set rule conditions, give the rule a Name.
- Under Apply this rule if, choose The Sender then from the Select one dropdown, choose is external/internal
- A new pop-up window named select sender location will appear. Select Outside the organization from the drop down and click Save
- Click the blue + icon next to the is external/internal box to add a condition
- Under the new section that says And, choose the Select one drop down and choose The Recipient, then from the new Select one dropdown, choose is external/internal
- A new pop-up window named select sender location will appear. Select Outside the organization from the drop down and click Save

- Under Do the following, chose Redirect the message to then chose the following connector
- In the select connector pop up window, choose the connector you just created. In our example, it is the Special Outbound Connector. Click Save
- Leave Except if as it is, then click Next
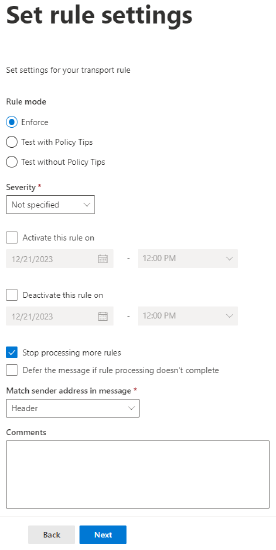
13. Under Set rule settings, check the box that says Stop processing more rules and leave the rest as default then click Next
14. You will now have the Review and finish window now. Click Finish

Leave a comment